7 - ASP.NET
As we are familiar with the ASP.NET Core concepts, we shall begin developing the WebShop for the Apiary solution.
Create a new Project (like last week) only with one configuration change: the Authentication Type should be set.
- None: No authentication.
- Individual accounts: These authentications are stored in a local or Azure-based database.
- Microsoft identity platform: This option uses Microsoft Entra ID or Microsoft 365 for authentication.
- Windows: Suitable for intranet applications.
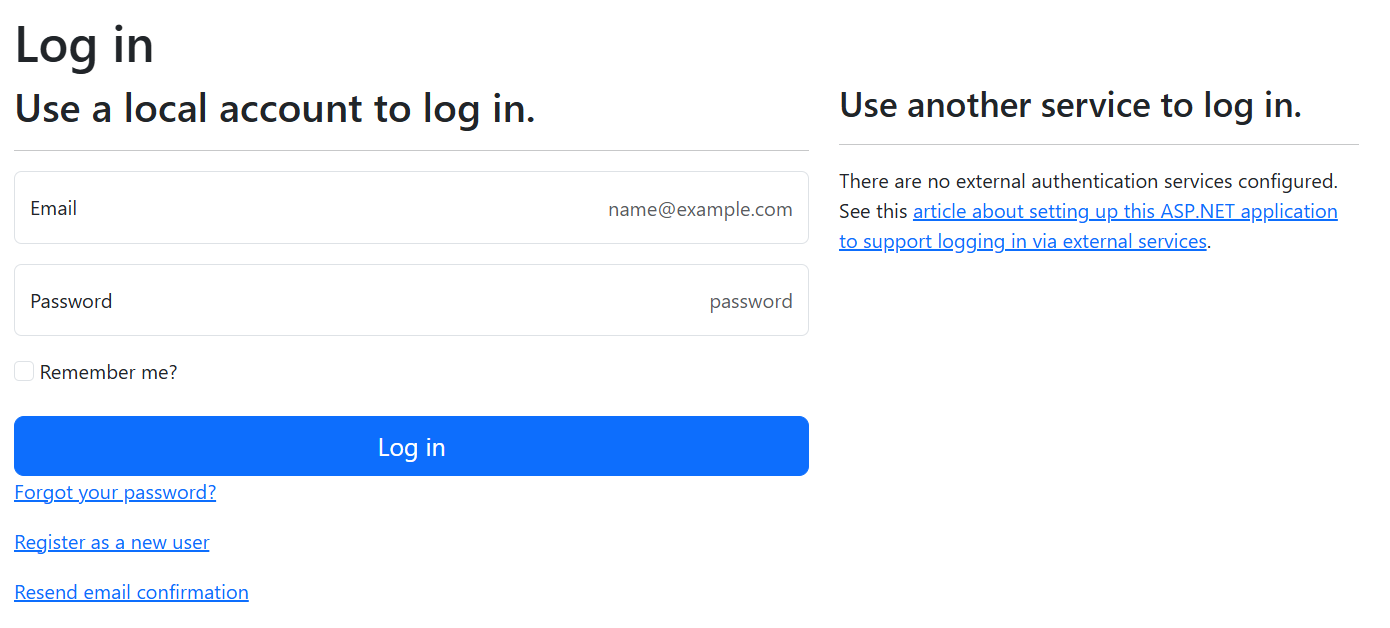
Now we would like to have the Individual accounts option selected. The generated project contains options for registering new accounts, login, logout, etc. (everything that is needed for managing user accounts).
If the configuration file is opened (appsettings.json), then the connection string should be there with a connection string to an MS SQL local database.
| appsettings.json | |
|---|---|
1 2 3 4 5 6 | |
Tip
Start the project and try to register a new user!
The database schema is already created during the project creation (Data/Migrations/00000000000000_CreateIdentitySchema.cs), however, the database has not been created.
To update the database, the "good-old" Update-Database command can be used from the NuGet Package Manager Console.
No e-mail provider1 is configured for sending confirmation or forgot password e-mails by default. For a real-word project, this would be an essential step, however, in the class, we can live without it. Also the two factor authentication is supported and should be configured with a selected application. Let's explore the generated user-management pages.
 |
|---|
| Authorization Required |
Products
To work with the MS SQL local database, we would duplicate the Product model class now (and unify it later).
Create the Product model class in the Models folder:
| Product.cs | |
|---|---|
1 2 3 4 5 6 7 8 9 10 11 | |
The image is a byte array now and we would convert it to a user-friendly format when needed.
As in the Windows Forms, the the new model class should be added to the DbContext class.
It's already generated and can be located in the Data/ApplicationDbContext.cs file:
| ApplicationDbContext.cs | |
|---|---|
1 2 3 4 5 | |
(Don't forget to do the Add-Migration and the Update-Database steps).
When the user navigates to a page, we don't want to show them exactly the same data structure.
For this reason, we can implement a view model, that nearly matches the database schema (Product class):
| ProductViewModel.cs | |
|---|---|
1 2 3 4 5 6 7 8 9 10 11 12 13 | |
The next step should be the controller creation: right-click on the Controllers folder and Add -> Controller.
In the pop-up window, select the MVC Controller with views, using Entity Framework.
Then, the Model class should be the Product (WebShop.Models) and the DbContext class should be the ApplicationDbContext (WebShop.Data).
The controller automatically named as ProductsController.
That's the naming convention of the controllers.
The action will take a while to generate all the necessary code (the controller and the views).
Tip
Check the newly generated code!
Those parts that should be accessible for logged in users only can be marked with the [Authorize] filter.
If
Create
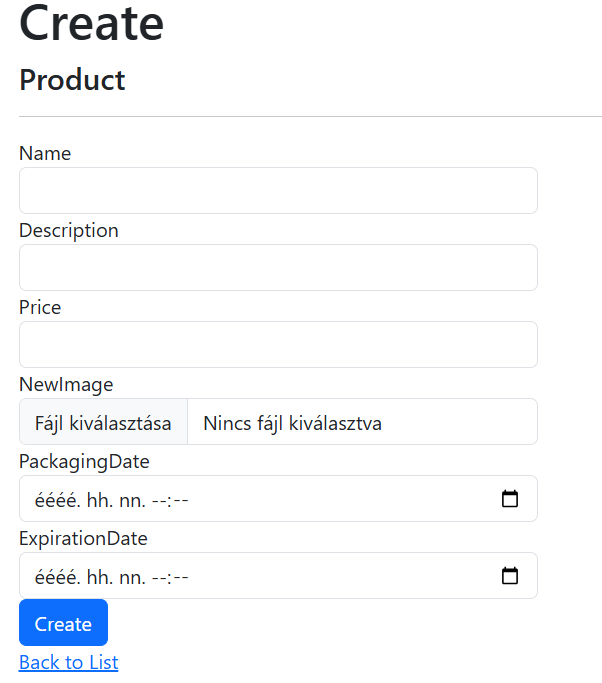
First we implement some changes in the new product addition to be able to upload images.
Start with the view part:
- Change the model to the
ProductViewModelin the first row:
| Create.cshtml | |
|---|---|
1 | |
- Add the
enctype="multipart/form-data"to theform.
| Create.cshtml | |
|---|---|
1 | |
- Add
type="number"to the price related form-group.
| Create.cshtml | |
|---|---|
1 2 3 4 5 | |
- Update the Image related form-group to handle files (
type="file")
| Create.cshtml | |
|---|---|
1 2 3 4 5 | |
When these are done, the UI should look like this:
 |
|---|
| Add Product |
Next the controller should be changed to handle the uploaded image and convert it to the desired format to store in the database.
| ProductsController.cs | |
|---|---|
1 2 3 4 5 6 7 8 9 10 11 12 13 14 15 16 17 18 19 20 21 22 23 24 25 26 27 28 29 30 31 32 | |
Index
After a product is added to the database and we're redirected to the listing page (index), the byte array is visible as raw numbers.
It would be much nicer to show the image instead of the raw data.
Inside the foreach cycle, the image related table cell should be changed:
| Index.cshtml | |
|---|---|
1 2 3 4 5 6 7 8 | |
Here model objects are coming and not the view model.
Details and Delete
These two pages are similar, it would be duplicate to show both modifications.
(Of course the Delete.cshtml and Details.cshtml should be changed.)
The image related HTML tags should be changed to convert the byte array base 64 string and show it in an image tag if there's an image.
If the Image tag is empty, then a message is shown.
| Details.cshtml and Delete.cshtml | |
|---|---|
1 2 3 4 5 6 7 8 9 10 11 12 | |
Edit
- Change the model to the
ProductViewModelin the first row:
| Edit.cshtml | |
|---|---|
1 | |
- Add the
enctype="multipart/form-data"to theform.
| Edit.cshtml | |
|---|---|
1 | |
- Show the existing image (if any) and provide an option to upload a new image.
| Edit.cshtml | |
|---|---|
1 2 3 4 5 6 7 8 9 10 11 12 13 14 15 16 | |
Again the controller should be aligned to the new behavior: a view model object should be returned and not a simple Product.
| ProductsController.cs | |
|---|---|
1 2 3 4 5 6 7 8 9 10 11 12 13 14 15 16 17 18 19 20 21 22 23 24 25 | |
| ProductsController.cs | |
|---|---|
1 2 3 4 5 6 7 8 9 10 11 12 13 14 15 16 17 18 19 20 21 22 23 24 25 26 27 28 29 30 31 32 33 34 35 36 37 38 39 40 41 42 43 44 45 46 47 48 49 50 51 52 53 54 | |